
12V LED Strip Lights: Installation, Power, and Best Use Cases
12V LED Strip Lights: Installation, Power, and Best Use Cases
If you’re comparing flexible lighting options for homes, vehicles, retail displays, or outdoor accents, 12V LED strip lights are a smart, versatile choice. This in‑depth guide explains what 12V LED strips are, how to plan and install them safely, and where they work best—from under‑cabinet kitchen lighting and bedroom ambience to RV, boat, and vehicle lighting. You’ll learn how to size power supplies, choose the right waterproof rating, avoid voltage drop, and select dimmers and smart controllers that make your 12V LED strip lights easy to live with every day.
Use this as your complete playbook to get clean, flicker‑free illumination with long service life and minimal hassle.
What Are 12V LED Strip Lights?
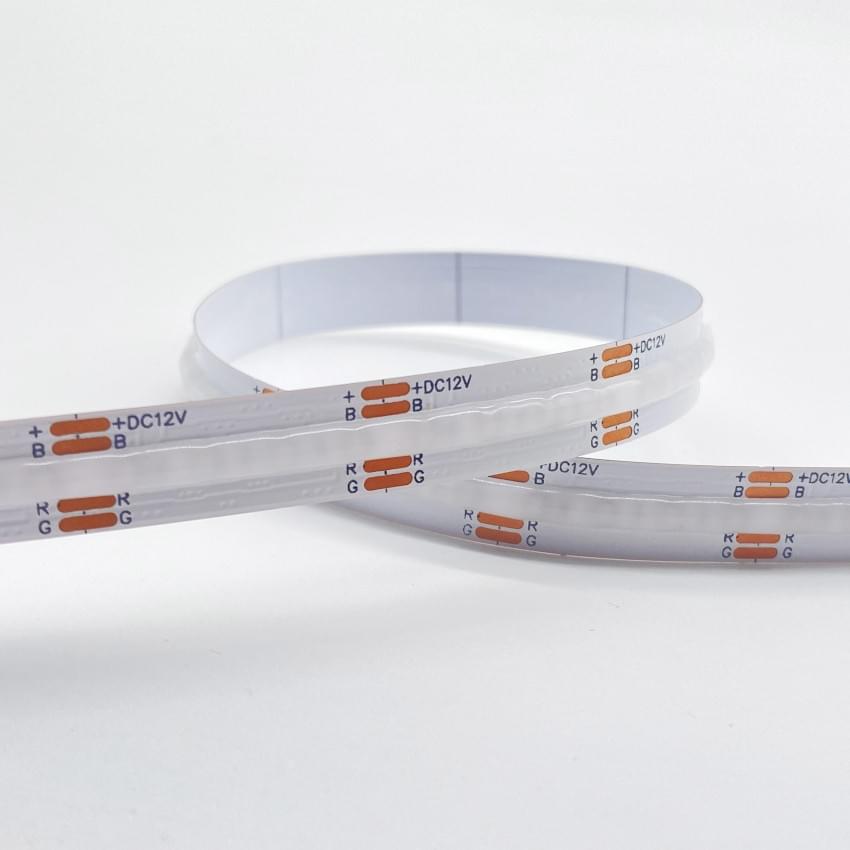
12V LED strip lights are flexible circuit boards populated with light‑emitting diodes (LEDs) and designed to run on a 12‑volt direct current (12V DC) power source. They typically feature adhesive backing for quick mounting and cut lines (usually every 25–100 mm) so you can trim to length. Popular formats include:
- Single‑color (warm white, neutral white, cool white)
- Tunable white (CCT‑adjustable from warm to cool)
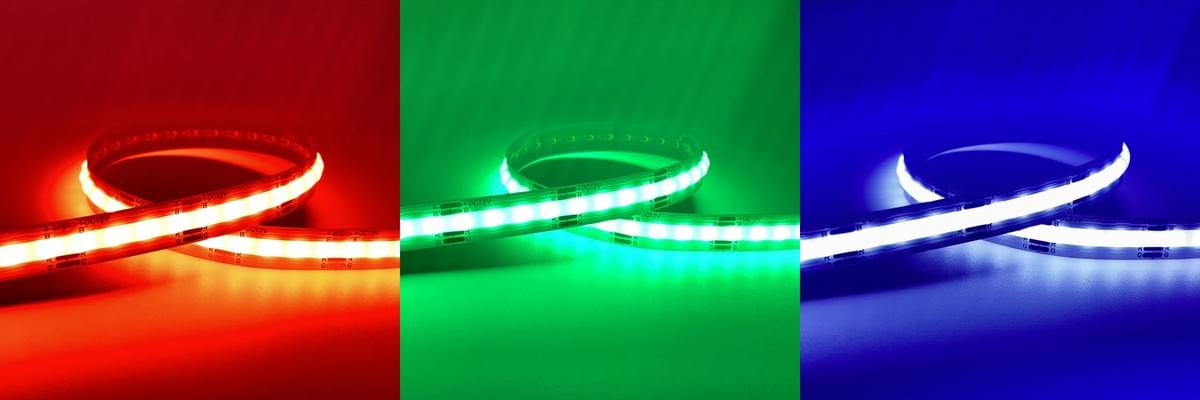
- RGB (red, green, blue) for color mixing
- RGBW/RGBCCT (adds dedicated white or tunable white for better pastels and whites)
- High‑CRI white strips for accurate color rendering in kitchens, closets, and displays
Why 12V? Compared with 24V strips, 12V options excel in shorter runs, tighter bend radii, and battery‑powered applications like cars, vans, RVs, and boats. They’re also widely compatible with automotive systems and small DC adapters, making them accessible for DIY projects.
12V vs 24V: Which Should You Choose?
- Run length and voltage drop: 24V strips generally permit longer runs before brightness falls off. For short to medium runs, 12V is perfectly fine and often more convenient.
- Power sourcing: If you have a 12V supply (car, RV, solar battery bank), 12V LED strip lights are the natural fit.
- Dimming and control: Both voltages support PWM dimming and smart controllers; just match your controller and power supply voltage to the strip.
- Cutting increments: 12V strips typically have shorter cut segments, allowing more precise lengths—useful for cabinetry and shelves.
If your project needs long continuous runs (e.g., over 16–20 feet / 5–6 meters without power injection), consider 24V. Otherwise, 12V strikes a great balance for most residential and mobile installations.
Key Specs to Understand
- Voltage: 12V DC. Never connect directly to AC.
- Power consumption: Expressed as watts per meter (W/m) or watts per foot (W/ft).
- LED density: LEDs per meter (e.g., 60, 120, 180). Higher density = smoother light.
- Color quality: CRI (Color Rendering Index) and CCT (correlated color temperature).
- IP rating: IP20 (indoor, no moisture), IP65 (splash‑resistant), IP67/IP68 (immersion‑resistant).
- PCB width: Commonly 8 mm, 10 mm, or 12 mm; match to connector/channel.
- Dimming: PWM via inline dimmers, wall dimmers (with suitable driver), or smart controllers (Wi‑Fi/Zigbee).
Planning Your 12V LED Strip Lights Project
A thoughtful plan prevents flicker, dim areas, or overheating.
Define the goal
- Task lighting (bright, focused): kitchen counters, workbenches.
- Accent lighting (soft, indirect): coves, shelves, toe‑kicks, headboards.
- Decorative/color: gaming setups, TV bias lighting, party spaces.
Choose brightness and color
- Task: higher lumen output (e.g., 12–18 W/m white strips, high CRI).
- Accent: moderate output (e.g., 7–12 W/m).
- Warm white (2700–3000K) for cozy spaces; neutral (3500–4000K) for balanced look; cool (5000–6500K) for crisp, modern or garage/workbench.
Pick the right IP rating
- Indoors dry: IP20.
- Kitchens/bathrooms (splash zones), patios under cover: IP65.
- Exterior exposure or marine: IP67/IP68 with sealed ends.
Select the mounting surface and profile
- Use aluminum channels with diffusers for better heat dissipation and a professional finish.
- Conceal LED dots with higher density strips and deeper diffusers when in direct view.
Decide on controls
- Inline rotary or touch dimmer for simplicity.
- RF remote for convenience.
- Smart controllers (Wi‑Fi/Zigbee) to integrate with voice assistants and schedules.
- For RGB/RGBW, choose compatible multi‑channel controllers.
How to Size Your 12V Power Supply
Always match the power supply (12V DC driver) to your strip’s wattage plus a safety margin.
- Find strip power draw: e.g., 12 W/m.
- Multiply by total length: 4 m × 12 W/m = 48 W.
- Add 20–30% headroom: 48 W × 1.25 ≈ 60 W.
- Choose a 12V, 60 W (or higher) DC power supply.
If splitting runs to multiple areas, you can use several small supplies or a single larger one with appropriate distribution and fusing. For automotive/RV use, you can power strips directly from the 12V system through a properly rated fuse and switch, or use a DC‑DC regulator for stabilized voltage and surge protection.
Avoiding Voltage Drop and Uneven Brightness
Voltage drop causes strips to look dimmer at the far end. Minimize it by:
- Powering both ends of the strip (feed from center or both ends).
- Keeping individual runs shorter (often ≤5 m/16.4 ft for many 12V strips).
- Using thicker wire for longer leads (e.g., 18 AWG or thicker depending on current).
- Injecting power every few meters on high‑power strips.
- Avoiding daisy‑chaining too many reel segments end‑to‑end.
Quick sizing example:
- A 12V strip at 5 A total current over a 10 ft lead may require 16–18 AWG to keep voltage drop below ~3%. Use online calculators or manufacturer charts for precision.
Connectors, Soldering, and Polarity
- Polarity matters: 12V strips have marked +12V and – pads. Reverse polarity can damage the strip or controller.
- Solder for best reliability. Clip‑on connectors are convenient but can introduce resistance and intermittent connections, especially with silicone‑coated IP65+ strips.
- Seal outdoor connections with heat‑shrink and silicone sealant to maintain IP rating.
- For RGB/RGBW, match each channel (R, G, B, W) to the controller outputs. Keep wire lengths similar to avoid color imbalance.
Dimming and Control Options for 12V LED Strip Lights
- Inline PWM dimmers: Simple, inexpensive, great for single zones.
- Wall dimming: Use a 12V‑compatible PWM dimmer or a wall dimmer that pairs with a low‑voltage PWM module. Traditional AC wall dimmers do not directly dim 12V DC strips unless paired with the correct driver/controller.
- Smart controllers: Wi‑Fi, Zigbee, Z‑Wave, or BLE variants offer app control, scenes, schedules, and voice integration. Ensure the controller supports 12V input and your strip type (single white, CCT, RGB, RGBW, or RGBCCT).
- Music and scene effects: Popular for gaming rooms and parties; be sure the controller’s max current matches your strip length.
Heat Management and Lifespan
Even efficient LEDs generate heat. Excess heat reduces lumen output and lifespan.
- Use aluminum channels or mount to metal surfaces when possible.
- Avoid enclosing strips in tightly sealed spaces unless they’re rated for it and derated accordingly.
- Don’t exceed manufacturer’s recommended run lengths without power injection.
Safety Essentials
- Use UL‑ or ETL‑listed power supplies and controllers when available.
- Add an inline fuse for automotive/RV installations sized slightly above the expected current draw.
- Disconnect power before cutting or soldering.
- For bathrooms and outdoor areas, follow local electrical codes and use GFCI‑protected circuits on the AC side of the power supply.
Step‑by‑Step Installation: Under‑Cabinet Kitchen Lighting
Under‑cabinet task lighting is one of the most popular applications for 12V LED strip lights.
Measure and plan
- Measure each cabinet run. Plan breaks where you’ll have corners or gaps.
- Choose high‑CRI white strips (90+ CRI) around 3000–4000K for natural food colors.
Choose components
- 12V LED strip lights (e.g., 10–14 W/m).
- 12V power supply with 25–30% headroom.
- Aluminum channels with diffusers to hide dots and dissipate heat.
- A dimmer or smart controller rated for your current.
- Wire (18–20 AWG), corner connectors or solder, mounting clips.
Prep the surface
- Clean the underside of cabinets with isopropyl alcohol.
- Dry thoroughly.
Mount channels and route wire
- Cut channels to length; dry‑fit first.
- Drill small holes at cabinet bottoms or backs to route low‑voltage wire invisibly.
Cut and attach strips
- Cut only on the marked cut lines.
- Dry‑fit strips into channels. Adhere once you’re happy with positioning.
Wire and test
- Observe polarity: +12V to +12V, – to –.
- Temporarily power on to verify uniform brightness before finalizing.
Finish and seal
- Snap diffusers on. Tidy wires with clips or cable raceways.
- Install the dimmer in an accessible spot; label if multiple zones.
- Pro tip: If a long run appears dim at the far end, power from both ends or split the run and feed from the center.
Step‑by‑Step Installation: TV Bias Lighting
TV bias lighting reduces eye strain and deepens perceived contrast.
- Choose a low‑to‑moderate brightness 12V RGBW or 3000–4000K white strip.
- Clean the TV’s back panel; avoid vents and ports.
- Plan a rectangular loop around the TV perimeter about 2–4 inches from the edges.
- Cut to length and use corner connectors or gentle bends at corners.
- Connect to a small 12V power supply or a USB‑to‑12V step‑up module (only if rated for your strip’s current—often a dedicated 12V supply is better).
- Add a remote or smart controller for quick color temperature/brightness changes.
Step‑by‑Step Installation: Vehicle/RV/Van Lighting
12V LED strip lights are ideal in vehicles because they natively match the electrical system.
Decide zones
- Overhead ambient strips in an aluminum channel.
- Under‑cabinet or toe‑kick lighting in a van build.
- Exterior awning lights with IP67+ strips.
Protect and switch
- Use an appropriately sized fuse near the battery feed.
- Add a labeled switch panel or smart low‑voltage controller.
Manage wiring
- Use automotive‑grade wire and loom for abrasion resistance.
- Ground securely to the chassis or a designated ground bus.
Test with engine on/off
- Vehicle systems can vary from ~11.5–14.4V. Consider a DC‑DC regulator if your strips are particularly sensitive or if you see noticeable brightness shifts.
Popular Use Cases for 12V LED Strip Lights
- Under‑cabinet kitchen lighting
- Pantry, closet, and wardrobe lighting with door‑activated switches
- Bookshelf and display cabinet accent lighting
- Stair and hallway night lighting (motion sensor activated)
- Bedroom headboard, cove, and under‑bed ambience
- Gaming desk, monitor, and PC case lighting (RGB/RGBW)
- TV bias lighting for reduced eye strain
- Garage workbench task lighting
- Retail shelving, signage backlighting, and product displays
- Bars, restaurants, and cafés for under‑bar and toe‑kick accents
- Outdoor deck, railing, and pergola lighting (IP65–IP67)
- Garden features and pathway edges (within rated enclosures)
- RV, camper van, and boat cabin lighting
- Car interior footwell and trunk lighting
- Photography and video accent lighting in DIY light panels
- Holiday decor and party scenes with dynamic effects
Choosing the Right Accessories
- Aluminum channels/extrusions: surface, recessed, corner, and flexible profiles.
- Diffusers: clear for maximum brightness, frosted for dot‑free look.
- Motion sensors: great for closets, stair treads, and bathrooms.
- Touch dimmers and controllers: integrate into furniture or cabinetry.
- Corner and gapless connectors: use sparingly; solder for critical joints.
- Cable management: stick‑on clips, raceways, and heat‑shrink for clean installs.
Troubleshooting 12V LED Strip Lights
One end looks dim:
Voltage drop—feed power from both ends or inject power mid‑run.
Entire strip won’t light:
Check polarity, fuses, and power supply output. Confirm controller orientation on multi‑channel strips.
Flicker at low dim levels:
Use a quality PWM dimmer/controller; avoid mismatched drivers.
Color mismatch on RGB/RGBW:
Confirm each channel has a solid connection; verify controller settings and maximum current.
Adhesive won’t hold:
Clean the surface better, warm the adhesive slightly, or use mounting clips/neutral cure construction adhesive. Aluminum channels improve adhesion and heat management.
Best Practices Summary
- Calculate total wattage and add 20–30% headroom in your 12V power supply.
- Plan wire gauges and injection points to minimize voltage drop.
- Use aluminum channels for heat dissipation and professional finish.
- Match IP rating to the environment, and seal outdoor connections.
- Use appropriate PWM dimmers/controllers; don’t expect AC wall dimmers to directly control low‑voltage DC strips.
- Solder critical connections; label zones for maintenance.
- Test everything before final mounting.
Advanced Tips for Pros
- Dual‑row and high‑density 12V strips: For dotless lines of light under shallow lips, pick high‑density strips with frosted diffusers.
- Tunable white (CCT) kitchens: Pair a CCT strip with a dual‑channel controller to shift from warm evening light to crisp daytime task light.
- Scene layering: Combine a bright task strip with a lower‑output accent strip on a second channel for day/night modes.
- Photometric planning: For precise task lighting, aim for 300–500 lux on counters. Adjust strip wattage, diffuser, and distance to surface accordingly.
- Low‑voltage code compliance: In built‑ins, ensure the AC side of your power supply is accessible for service and placed in ventilated locations.
Frequently Asked Questions (FAQ)
Q: Are 12V LED strip lights bright enough for task lighting?
A: Yes, if you choose appropriate wattage (often 10–18 W/m) and high‑CRI white. Use aluminum channels to reduce hotspots and place strips near the front edge of cabinets to light the work surface.
Q: How long can I run a 12V LED strip without power injection?
A: It depends on the strip’s current draw and copper weight, but many 12V strips perform best at ≤5 m (16.4 ft) per power feed. For longer runs, feed from both ends or inject power every few meters.
Q: Can I cut and reconnect 12V LED strips?
A: Yes. Cut only at marked points and reconnect using solder or compatible connectors. Maintain correct polarity and, for RGB/RGBW, match channel order.
Q: What’s the difference between RGB and RGBW for 12V strips?
A: RGB mixes red, green, and blue for colors; whites can look slightly tinted. RGBW adds a dedicated white channel for cleaner whites and better pastels. RGB+CCT adds tunable white for even more flexibility.
Q: Do I need a special dimmer for 12V LED strip lights?
A: Use a 12V PWM dimmer or a controller designed for your strip type. Standard 120V wall dimmers require a compatible low‑voltage driver/controller to work with DC strips.
Q: Can I power 12V LED strips from a car battery?
A: Yes. Add a properly sized fuse near the battery, use automotive‑grade wire, and consider a DC‑DC regulator if you notice brightness changes with engine on/off.
Q: Are waterproof 12V LED strips safe outdoors?
A: Use IP65 for splash zones and IP67/IP68 for direct exposure. Seal cut ends and connections. Mount in channels to support and protect the strip.
Q: Why is my strip warm to the touch?
A: Some warmth is normal. If it’s hot, check that the strip isn’t over‑driven, ensure it’s mounted to a heat‑dissipating surface, and verify your power supply voltage is correct.
Real‑World Scenario Guides
Closet lighting with door sensors:
- Mount an IP20 12V high‑CRI strip along the closet frame inside an aluminum channel.
- Use a magnetic or IR door sensor to switch the 12V feed on opening.
- Keep runs short; one 12V power supply can feed multiple doors via a fused distribution block.
Stair tread night lights:
- Install short segments under stair nosings in diffusion channels.
- Power from a central 12V supply with motion sensors at top and bottom landings.
- Opt for warm white (2700–3000K) at low brightness for comfortable night visibility.
Deck rail accent lighting:
- Choose IP67 12V strips in aluminum channels under the rail lip to shield from weather.
- Inject power every 3–5 m and seal all terminations with heat‑shrink and silicone.
- Add a photocell or smart schedule for dusk‑to‑dawn operation.
Retail shelf highlights:
- High‑CRI neutral white to enhance product colors.
- Use uniform profiles with frosted diffusers to eliminate dotting in reflective packaging.
- Central 12V power supply in a ventilated cabinet with labeled zone wiring.
Sample Bill of Materials (BOM) Template
- 12V LED strip lights (length and type)
- 12V DC power supply (with 25–30% headroom)
- PWM dimmer or smart controller (match total current)
- Aluminum channels and diffusers (type and quantity)
- Wire (gauge sized to current and distance)
- Corner connectors or solder supplies
- Mounting clips, cable raceways, heat‑shrink, sealant (for outdoor)
- Inline fuse and switch (automotive/RV)
Conclusion
12V LED strip lights deliver a powerful mix of flexibility, safety, and ease of installation. Whether you’re brightening a kitchen, adding ambience to a bedroom, building a clean gaming setup, or outfitting an RV, the 12V ecosystem of strips, power supplies, and controllers makes it straightforward to get professional‑looking results. Plan your run lengths, size your power supply with headroom, manage heat with aluminum channels, and use proper dimming and control. The payoff is even, flicker‑free lighting that looks great and lasts.