
The Ultimate Guide to Outdoor LED Strip Lights: Waterproof Ratings, Installation, and Buying Tips
The Ultimate Guide to Outdoor LED Strip Lights: Waterproof Ratings, Installation, and Buying Tips

If you’re planning to upgrade your yard, patio, deck, pathway, or architectural features, outdoor LED strip lights are one of the most flexible and cost‑effective ways to add beauty, safety, and functionality. Yet putting strip lights outdoors is not the same as running them under kitchen cabinets. Sun, rain, snow, dirt, insects, and temperature swings will quickly expose weak spots in products and installations. This guide takes a waterproof‑first approach so you can choose outdoor LED strip lights that survive the elements and look great for years.
1) What makes a strip light “outdoor”?
At a minimum, outdoor LED strip lights must resist water and dust. Most indoor strips have exposed copper pads and components; outdoors, these must be sealed. The most common protection methods are:
- Silicone or PU encapsulation (IP65): A clear or milky coating over the top of the strip protects against splashes and light rain. The back is usually adhesive with exposed tape.
- Silicone sleeve/tube (IP67): The entire strip is fed through a sealed silicone jacket, protecting it from immersion up to about 1 meter for short periods.
- Fully potted or molded (IP68): The strip is completely embedded in silicone or epoxy, often with a thicker profile. Suitable for prolonged immersion, fountains, or areas with heavy spray.
Beyond water, outdoor-rated strips should also offer:
- UV resistance: Prevents yellowing and cracking in sunlight.
- Salt‑mist and corrosion resistance: Important near coasts or pools.
- Wide operating temperature: Typical range −20°C to +50°C (−4°F to 122°F), sometimes wider for premium products.
- Mechanical robustness: Stronger PCB, thicker copper, and impact resistance (sometimes expressed via IK ratings).
2) Demystifying IP ratings for waterproofing
IP (Ingress Protection) is written as IPXY:
- The first digit (X) rates solids/dust (0–6). 6 means dust‑tight.
- The second digit (Y) rates water (0–9K). Higher is more water‑resistant.
For outdoor LED strip lights:
- IP65: Dust‑tight; protected from jets of water. Good for soffits, under‑eaves, and sheltered decks.
- IP67: Dust‑tight; protected against temporary immersion up to 1 m. Ideal for exposed railings, steps, pergolas.
- IP68: Dust‑tight; suitable for continuous immersion per manufacturer spec. Use for water features, docks, and heavy splash zones.
Tip: The adhesive at the back and any cut/join points often become the weak links. Even an IP67 strip can fail if you leave cut ends unsealed. Always finish ends with compatible silicone caps, end‑stops, or potting compound supplied by the manufacturer.
3) Voltage choices: 5V vs 12V vs 24V vs 120V/240V “high‑voltage” strips
- 5V: Generally used for addressable pixel strips (WS2812/Neopixel). Not ideal for long outdoor runs due to voltage drop; requires frequent power injection and careful waterproofing around controllers.
- 12V: Common for outdoor LED strip lights. Easier to cut and power in small areas (carports, small decks) with manageable voltage drop up to ~5–10 m per run, depending on wattage.
- 24V: Best all‑around for longer runs. Lower current for the same power reduces voltage drop and heat, enabling cleaner installations up to ~10–20 m per feed with proper gauge wiring.
- 120V/240V AC “rope” or rectified strips: Come in long runs (up to 50–100 m) and are very bright, but are less flexible and must be handled with strict safety precautions. Use only UL/ETL‑listed outdoor products with GFCI‑protected outlets. Not recommended for low‑voltage landscape systems.
For most homeowners, 12V and 24V low‑voltage outdoor LED strip lights are the sweet spot for safety, flexibility, and performance.
4) Brightness, efficiency, and color quality
When you compare outdoor LED strip lights, look beyond the marketing lumens. Consider:
- Lumens per meter (or foot): 300–1,500 lm/m is typical. Accent lighting may need 200–500 lm/m; task or pathway lighting might need 500–1,000 lm/m; façade washing can exceed 1,000 lm/m.
- Watts per meter: 4.8 W/m, 9.6 W/m, 14.4 W/m, 19.2 W/m, and 24 W/m are common. Higher power generally equals more brightness and heat.
- Efficacy: Lumens per watt (lm/W). Good outdoor strips sit around 80–120 lm/W; premium products may exceed that.
- CRI and CCT: A CRI 90+ strip renders colors more naturally. Choose CCT (correlated color temperature) based on ambiance:
- 2700–3000K: Warm and cozy for patio dining areas.
- 3500–4000K: Neutral for paths and steps.
- 5000–6500K: Cool/“daylight” for security zones or modern aesthetics.
- RGB, RGBW, and RGBIC:
- RGB: Red/Green/Blue diodes mix colors, but white can look bluish.
- RGBW: Adds dedicated white LEDs for better whites and warm/cool options.
- RGBIC/Addressable: Each segment or pixel has an IC (e.g., WS2811/SM16703), enabling dynamic multi‑color effects per section. Great for festive seasons, but plan for waterproof controllers and more complex wiring.
5) Power planning: avoid dim ends and overheated drivers
Calculate power needs before you buy:
- Total power (W) = strip wattage per meter × total meters × 1.2 safety factor.
- Choose a power supply (driver) with 20–30% headroom over calculated load.
- Voltage drop: Long runs cause the far end to dim or shift color. Solutions:
- Use 24V strips for longer runs.
- Power inject every 5–10 m depending on wire gauge and load.
- Use thicker cable (lower AWG number) for longer distances.
- Feed strips from both ends or from the center.
- Weatherproofing the power supply:
- Use IP65–IP67 drivers outdoors; mount under eaves or in ventilated, weatherproof junction boxes.
- Keep drivers off the ground, with drip loops and strain relief on cables.
- Use GFCI outlets and surge protection, especially in thunder‑prone areas.
6) Controls: from simple dimmers to smart ecosystems
- On/off and dimmers: Inline PWM dimmers (12/24V) with remote controls are simple and reliable for white or single‑color strips.
- Color controllers: For RGB/RGBW strips, use waterproof controllers rated for outdoor use. Verify current output per channel and total load.
- Smart controls: Wi‑Fi, Bluetooth, Zigbee, Z‑Wave, and Matter‑compatible controllers allow app and voice control. Check outdoor temperature ratings and IP protection for any hubs or bridges if mounted outside.
- Timers and sensors: Add photocells (dusk‑to‑dawn), PIR motion sensors for steps, and astronomical timers for set‑and‑forget operation.
- Professional protocols: For large installations, DMX/RDM or DALI can deliver robust, synchronized control with weatherproof decoders.
7) Installation planning: design with water in mind
Water follows gravity and finds gaps. Design your outdoor LED strip lights layout to keep moisture away from vulnerable parts.
- Mounting location:
- Under‑eaves and soffits shield strips from direct rain and UV.
- Use aluminum channels with diffusers for clean lines, heat dissipation, and extra protection.
- On decks or stairs, recess channels into risers or under handrails to avoid direct foot traffic and water pooling.
- Adhesion:
- Many outdoor strips include adhesive, but for durability use 3M VHB tape or silicone mounting clips. On porous or rough surfaces (brick, stucco, unfinished wood), mechanical clips or screws are safer than tape.
- Clean surfaces with isopropyl alcohol, dry thoroughly, and apply when temperatures are between 15°C and 35°C (59–95°F) for best tape adhesion.
- Bends and corners:
- Respect the minimum bend radius. For sharp corners, use L‑shaped aluminum channels or flexible connectors instead of forcing the strip to kink.
- Thermal management:
- High‑density, high‑power strips run warm. Aluminum channels act as heatsinks, extending LED life and improving lumen maintenance.
8) Cutting, connecting, and sealing for true waterproofing
Most outdoor LED strip lights have marked cut points. When you cut, you expose copper pads that can wick moisture. Follow these best practices:
- Use manufacturer‑approved connectors or solder the joints. Soldered joints are more reliable outdoors.
- Seal every cut and connector:
- Slide on silicone end caps and fill with neutral‑cure silicone or potting gel.
- Use adhesive‑lined heat‑shrink tubing over splices; warm until glue flows and edges seal.
- For sleeves (IP67), re‑seal the jacket with compatible clamp caps and silicone plugs.
- Loop direction and drip loops:
- Arrange cables so water drips away from connectors, not into them. Create a small downward loop before entering boxes.
- Junction boxes:
- Use outdoor‑rated, gasketed enclosures (NEMA 3R/4X or IP65+) for power supplies and controllers. Desiccant packs help mitigate condensation.
9) Safety and compliance
Outdoor electrical work demands caution:
- Always use GFCI‑protected circuits for AC‑powered gear.
- For low voltage, use Class 2 power supplies where possible to limit maximum output.
- Choose products with safety marks (UL, ETL, CE where relevant) and RoHS compliance.
- Follow local codes for conduit, burial depth, and junction box types if you run cable underground or along structures.
- Avoid mixing polarities; double‑check RGB/RGBW controller pinouts (e.g., common anode vs common cathode).
- If you’re near a pool or hot tub, follow extra separation rules and consider hiring a licensed electrician.
10) Outdoor applications and design ideas
- Deck and patio perimeters: Outline edges beneath the lip of the deck for subtle glow and safer navigation.
- Stair treads and risers: Integrate diffused strips in aluminum channels beneath each step for uniform, glare‑free light.
- Pathways and garden borders: Low‑power warm white along edging creates a resort‑like feel without attracting too many insects.
- Under‑cap wall lighting: Tuck strips under retaining‑wall caps to wash stone textures beautifully.
- Pergolas and gazebos: Mount along beams for ambient lighting; add RGBW for scene changes during parties.
- Soffit and fascia grazing: Highlight architectural lines with 3000K or 4000K for a refined look.
- Water features and docks: Use IP68 strips with robust sealing; cool white can make water sparkle, while RGB adds drama.
- Signage and façade accents: Addressable RGBIC strips deliver dynamic effects for holidays or events.
11) Choosing the right outdoor LED strip lights: a step‑by‑step checklist
1. Define your goal:
- Accent, task, path/safety, or decorative effects?
2. Pick brightness and color:
- Choose lumens per meter and CCT (or RGB/RGBW/RGBIC) to suit the mood and function.
3. Select voltage:
- 24V for most longer runs; 12V for small areas; 5V only for short addressable runs with frequent power injection.
4. Waterproof rating:
- IP65 for sheltered; IP67 for exposed; IP68 for immersion/splash zones.
5. Channel and diffusion:
- Aluminum channels improve durability and appearance; diffusers soften hotspots.
6. Power and control:
- Size the driver with 20–30% headroom; choose dimmers/controllers compatible with your strip type and environment.
7. Connectors and sealing kit:
- Obtain end caps, heat‑shrink, neutral‑cure silicone, and waterproof connectors in advance.
8. Verify certifications and warranty:
- Look for UL/ETL listings, outdoor ratings, and a 2–5 year warranty from reputable brands.
9. Test before final install:
- Bench‑test the entire run, controller, and power supply for 30+ minutes before sealing.
12) Common mistakes to avoid
- Ignoring voltage drop: Leads to uneven brightness and color shift. Plan power injection and use proper wire gauge.
- Overloading the power supply: Causes flicker, overheating, and premature failure.
- Trusting only the strip’s IP rating: Unsealed cut ends and connectors will leak; always seal field modifications.
- Skipping heatsinks: High‑power strips without aluminum channels can sag, discolor, or fail early.
- Using indoor adhesives outdoors: Standard foam tapes let go in heat, cold, or moisture; upgrade to VHB and clips.
- Mounting power supplies in sealed, unventilated boxes in the sun: Heat kills drivers. Provide shade and ventilation.
- Mixing incompatible components: 24V strips require 24V supplies; RGBW controllers must match pinout and current.
13) How to install outdoor LED strip lights: a practical walkthrough
Tools and materials:
- Outdoor LED strip lights (IP67 or IP68 for exposed areas)
- Matching power supply (12V or 24V) with 20–30% headroom
- Weatherproof controller/dimmer if needed
- Aluminum channels with diffusers and mounting clips
- 3M VHB tape or stainless clips/screws
- Outdoor‑rated wire (e.g., 18/2 for white, 18/5 for RGBW; adjust gauge for current and length)
- Soldering iron, solder, flux; or waterproof connectors
- Heat‑shrink (adhesive‑lined), silicone end caps, neutral‑cure silicone sealant
- Wire strippers, cutters, drill/driver, measuring tape
- Outdoor junction box (NEMA 3R/4X), cable glands, and desiccant packs
- GFCI outlet and surge protector
Steps:
1. Plan the route: Measure runs, note cut points, and mark where the power supply and controller will live. Avoid locations with standing water or direct sprinkler hits when possible.
2. Prep surfaces: Clean mounting areas thoroughly and let them dry. Test‑fit channels and drill pilot holes for clips.
3. Bench test: Unroll the strip, connect to the power supply/controller, and test all colors/brightness. Let it run for 30 minutes to expose any defects.
4. Cut and connect: Cut at marked points. Solder leads (preferred) or use waterproof connectors. Keep polarity consistent, and pre‑fit heat‑shrink tubing before soldering.
5. Seal connections: Slide adhesive‑lined heat‑shrink over joints and shrink until sealant oozes slightly. Cap strip ends with silicone end caps filled with neutral‑cure silicone.
6. Mount channels: Install aluminum channels using screws/clips. If using tape, apply VHB to the channel base (not directly to raw wood or rough masonry) and add mechanical clips for insurance.
7. Install the strip: Press the strip into the channel, avoiding sharp bends. Snap in diffusers.
8. Route cables: Use UV‑resistant cable ties and clips. Create drip loops before cables enter enclosures.
9. Enclose and ventilate: Mount power supply and controller inside a weatherproof box with cable glands. Leave some airflow space; avoid direct sun if possible.
10. Final test and programming: Power on, check uniform brightness, test dimming and color scenes, and set timers or motion sensors as needed.
14) Maintenance and longevity
Outdoor LED strip lights can last 25,000–50,000 hours, but outdoor realities reduce lifespan if neglected. Simple maintenance extends life:
- Seasonal inspections: Each spring and fall, check adhesives, clips, seals, and diffusers. Re‑seat any loose sections.
- Clean diffusers: Wipe with mild soap and water; avoid harsh solvents that can cloud plastics.
- Check drainage: Ensure no water is pooling around connectors or boxes. Clear debris from channels on decks or steps.
- Firmware updates: If you use smart controllers, apply updates to improve reliability and security.
- Replace in segments: Keep spare sealed segments and connectors; you can swap only the failed portion if you designed with accessible junctions.
15) Comparing types of outdoor LED strip lights
- Standard flexible strips (IP65–IP67):
- Pros: Thin, easy to hide, cuttable, great for most eaves/decks.
- Cons: Needs careful sealing at ends; adhesive can degrade without channels.
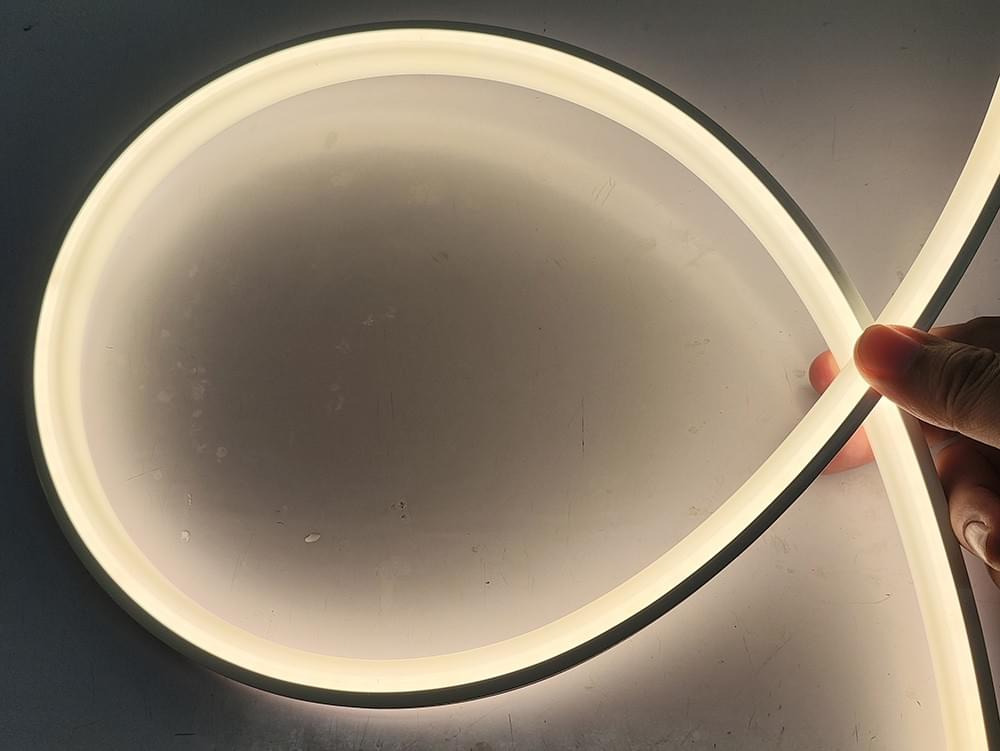
- Neon‑style flexible lights:
- Pros: Continuous, dot‑free line of light; excellent for signage and architectural edges; great diffusion and aesthetics.
- Cons: Thicker, larger bend radius, higher cost and power.
- Addressable pixel strips (RGBIC):
- Pros: Advanced effects, chasing patterns, holiday shows.
- Cons: More complex power and control; more points of failure; extra sealing at data injectors and controllers.
- High‑voltage rope/strip:
- Pros: Very long runs from a single feed, bright, simple on/off control.
- Cons: Rigid, potential strobing without quality rectification, stricter safety requirements, not ideal for subtle architectural lighting.
16) Budgeting: where to spend and where to save
- Spend on:
- Quality strips with thicker copper (at least 2 oz), UV‑stable silicone, and verified IP rating.
- Aluminum channels and stainless hardware.
- Outdoor‑rated power supplies and waterproof controllers from reputable brands.
- Proper connectors, end caps, and sealants.
- Save on:
- Over‑spec’d brightness you won’t use. Dimmability is more valuable than max lumens.
- Excessively long runs. Break projects into zones for efficiency and easier maintenance.
- Fancy app ecosystems if a simple remote meets your needs.
17) Frequently asked questions about outdoor LED strip lights
Q: Can I put regular indoor LED strips outside if I cover them?
A: Not recommended. Indoor strips lack UV protection and sealed components. Even under a covered patio, humidity and condensation can corrode contacts. Choose outdoor‑rated IP65+ products and seal all field cuts.
Q: What IP rating do I need for a deck with no roof?
A: IP67 is a safe baseline for exposed decks, stairs, and railings. If the area is frequently pressure‑washed or near a pool with heavy splash, consider IP68.
Q: How long can a 24V strip run before I need power injection?
A: It depends on wattage and wire gauge, but a common rule is 5–10 m per feed for 10–15 W/m strips. For 20–24 W/m, inject every 5–7 m or feed from both ends to minimize voltage drop.
Q: Do aluminum channels matter outdoors?
A: Yes. Channels improve heat dissipation, protect against impacts, provide a professional finish, and keep adhesives from failing in heat or humidity.
Q: Are RGBIC addressable strips waterproof?
A: They can be, but ensure both the strip and the controller/enclosures are IP‑rated. Data lines must be protected from moisture and electrical noise. Use gel‑filled connectors and heat‑shrink over splices.
Q: What’s better for gardens: warm or cool white?
A: Warm white (2700–3000K) flatters foliage and stone, while cool white (5000–6500K) can feel crisp but sometimes harsh. Many homeowners prefer 3000–3500K for a natural, welcoming look.
Q: Will outdoor LED strip lights attract bugs?
A: Insects are more attracted to UV and shorter wavelengths (blue). Warm white strips tend to attract fewer bugs than cool/daylight tones.
Q: How do I weatherproof the power supply?
A: Use an outdoor‑rated, UL/ETL‑listed driver inside a weatherproof box with cable glands, mounted vertically with drip loops. Keep it shaded and ventilated; avoid airtight, sun‑baked enclosures.
Q: Can I bury LED strips?
A: No. Strips are not designed for direct burial. If you need in‑ground lighting, use fixtures rated for burial or in‑ground installation with appropriate housings.
18) A sample parts list for a typical backyard project
- 2 × 5 m 24V IP67 outdoor LED strip lights, 4000K, 14.4 W/m (total 10 m)
- 1 × 24V 200–240 W outdoor power supply (20–30% headroom)
- 1 × IP67 PWM dimmer with RF remote (or smart controller rated for outdoors)
- 10 × 1 m aluminum channels with opal diffusers and clips
- 15 m of 16 AWG UV‑resistant cable
- Waterproof barrel connectors or solder + adhesive heat‑shrink
- Silicone end caps and neutral‑cure silicone sealant
- NEMA 4X junction box with cable glands and desiccant pack
- Stainless screws, VHB tape, and cable clips
19) Sustainability considerations
Outdoor LED strip lights already save energy compared to halogen or incandescent rope lights, but you can do more:
- Choose high‑efficacy strips to lower wattage for the same brightness.
- Use motion sensors and dusk‑to‑dawn control to reduce runtime.
- Select replaceable‑segment designs so you don’t discard the entire run when one section fails.
- Recycle aluminum channels and properly dispose of electronics according to local e‑waste rules.
20) Final thoughts
With the right planning and components, outdoor LED strip lights can transform your property while surviving sun, rain, and snow. Prioritize waterproofing—not just the IP rating of the strip, but every cut, connector, controller, and power supply. Choose an appropriate voltage, manage voltage drop, and use aluminum channels for durability. If you size the power correctly, seal meticulously, and conduct seasonal checkups, your outdoor LED strip lighting will deliver beautiful, reliable illumination for years.
By focusing on waterproof design, smart power planning, and durable installation practices, this guide equips you to pick and deploy outdoor LED strip lights that look great on day one and still shine bright in every season.